
Menus… Sounds like an obvious thing, doesn’t it? Well, let’s take a look at the ones in Asset Insider.
- Left Sidebar Menu (App main menu);
- Functional Menu (Ribbon) that is at the top-middle of our screen;
- Admin Menu in the top-right corner, where our login and settings are.
Main App Menu
Let’s start with our App main menu (Sidebar Menu) on the left. It is the one we create when making the app. The buttons and their functionality come from the ‘Sitemap’ in the editor. There can be more than one menu, and we select the different menus from the bottom section,
where the ‘Main Menu’ stands. 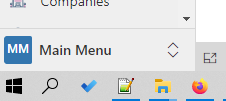
What is interesting here is the:
- Home button – from anywhere in the application, we can go to the ’Home’ screen.
- Recent – this is like our browser history and collects the 10 most recent locations we have visited, being a form or a view.
- Pinned – here, we can pin some of the items from the ‘Recent’ list and keep them for quick access if we visit them often.

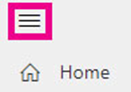
- The small, almost hidden hamburger button on the top - very useful when we want to use all the space on the screen instead of looking at the same menu all the time.
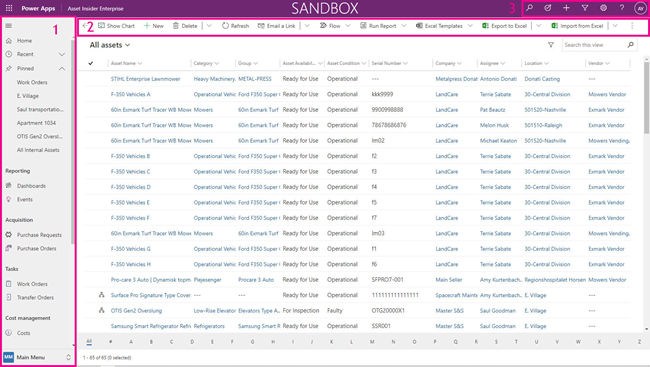
The Ribbon
The ribbon menu usually contains the “action” buttons for the view we are in.
It changes depending on our location – Dashboard, View, or Form:
Ribbon Menu in Dashboard:
Ribbon Menu in a view:
Ribbon Menu in a form:

Dashboard Ribbon Buttons
- Show global filter – here one can create a global filter to apply to the current dashboard and modify the information that is shown. The properties for the filter are listed once you click on it. The filters can be saved and re-used.
- New – here one can create a new dashboard if they have sufficient permissions.
- Set as default – here we can set which dashboard (selectable from the list where the dashboard name is) will be shown as default.
- Refresh all – refreshes the data, keeping any filters applied.
View ribbon buttons – no items selected
- Show/Hide Chart – here we can show/hide the charts prepared for the view or create our ones. Also, if we click on a property in the chart this will filter the view on the right half.
- New – create a new record.
- Delete – delete a selected record(s).
- Refresh – reload the view.
- Email a link – send an email with a link to the current view.
- Flow – here we can create and run flows from the current view.
- Run Report – here you can find predefined reports that you are not currently using.
- Excel Templates – here we define in the form of a template an Excel file and include different information from the view so we can export it as a file. Users can create their templates and share them with other users/teams.
- Export to Excel – here we can export the current view into an Excel file. From the dropdown there are different options:
- Open in Excel Online – opens the current view in Excel Online;
- Static Worksheet – exports all the pages of the current view in a worksheet, can be used for importing later;
- Static Worksheet (Page Only) – the same rule as the above, but only the records currently visible on the screen will be exported;
- Dynamic Worksheet – export of all the pages in a worksheet, that with a plugin installed in your browser edits in real times the information and when you hit “Save” in the worksheet the actual CDS records get updated. Note: Can be a bit slow on large amounts of records.
- Dynamic Pivot Table – the same as Dynamic Worksheet, but this time in a pivot table.
- Import from Excel – Import data from an Excel file by mapping fields;
- Import from CSV – same as above but the source is a CSV file;
- Import from XML - same as above but the source is an XML file.
- Create View – here the user can create a customized, personal view, on top of the pre-defined system views.
- Show As – here we can display the current view in the form of an editable grid and work with records directly in the view list.
View ribbon buttons – one or more items selected (only differences)
- Edit – here we can edit all properties of one or more records without going to the edit form. Note: Very useful for multiple edits.
- Activate – toggles the status of the selected record/s to Active.
- Deactivate - toggles the status of the selected record/s to Deactivated.
- Delete – deletes the selected record/s.
- Assign – changes the owner of the selected record/s.
- Share – shares the selected record/s with another user but keep the owner.
- Email a link – emails a link with the name and URL for each selected item.
- Аdd to queue – adds the items to a processing queue, the feature we are not using.
- Еxport to Excel – creates a downloadable Excel file, containing only the selected records.
Form Ribbon
- Open record set – opens all records from the previous view in a section in the form
- Save – saves current progress and refreshes the form
- Save and Close – saves current progress and returns to the previous view
- New – creates a new record
- Deactivate - toggles the status of the record to Deactivated
- Delete – deletes the record
- Refresh – reloads the form data
- Check Access – check which security roles/users have what privileges for this record
- Add to queue – send the item to a task queue
- Queue item details – get info about the queue
- Assign – change the owner of the record
- Share – share the record but keep the owner
- Email a link – creates an email including the name and a link to the record
- Flow – we can run or create a flow for this record
- Word Templates – create a word document containing information from the record
- Run Report – run a predefined report